
Automate Terraform Plan and Apply
This is Part II series of articles on "How to manage your GitHub Organization with Terraform". In Part I we covered the basics of Terraform, Github and how to manage GitHub organizations and their resources with Terraform.
In this article, you will learn how to automate the terraform plan and apply commands inside your CI and how to
deploy changes following the GitHub flow. Also, you will learn about
remote state and state locking are and how to accelerate Amazon S3 and DynamoDB to implement both mechanisms.
We will use Semaphore as our main CI and CD server, but you can easily use this guide with other providers also because we run everything inside docker containers without coupling any of the executing logic to the CI server.
Here is a brief overview of what we will cover:
- Design a Pipeline for running Terraform in Automation
- Set up Terraform Remote State and State Locking with Amazon S3
- Abstract common logic with Docker and GNU Make
- Create a GitHub Repository for versioning the Code
- Implement the Pipeline in Semaphore
- Conclusion
If you'd like to skip this guide and review the final result straight away, we uploaded a working example that manages a real organization with real resources we've created for this guide.
Design a Pipeline for running Terraform in Automation
The GitHub flow is a lightweight, branch-based workflow that supports teams and projects where deployments are made regularly.
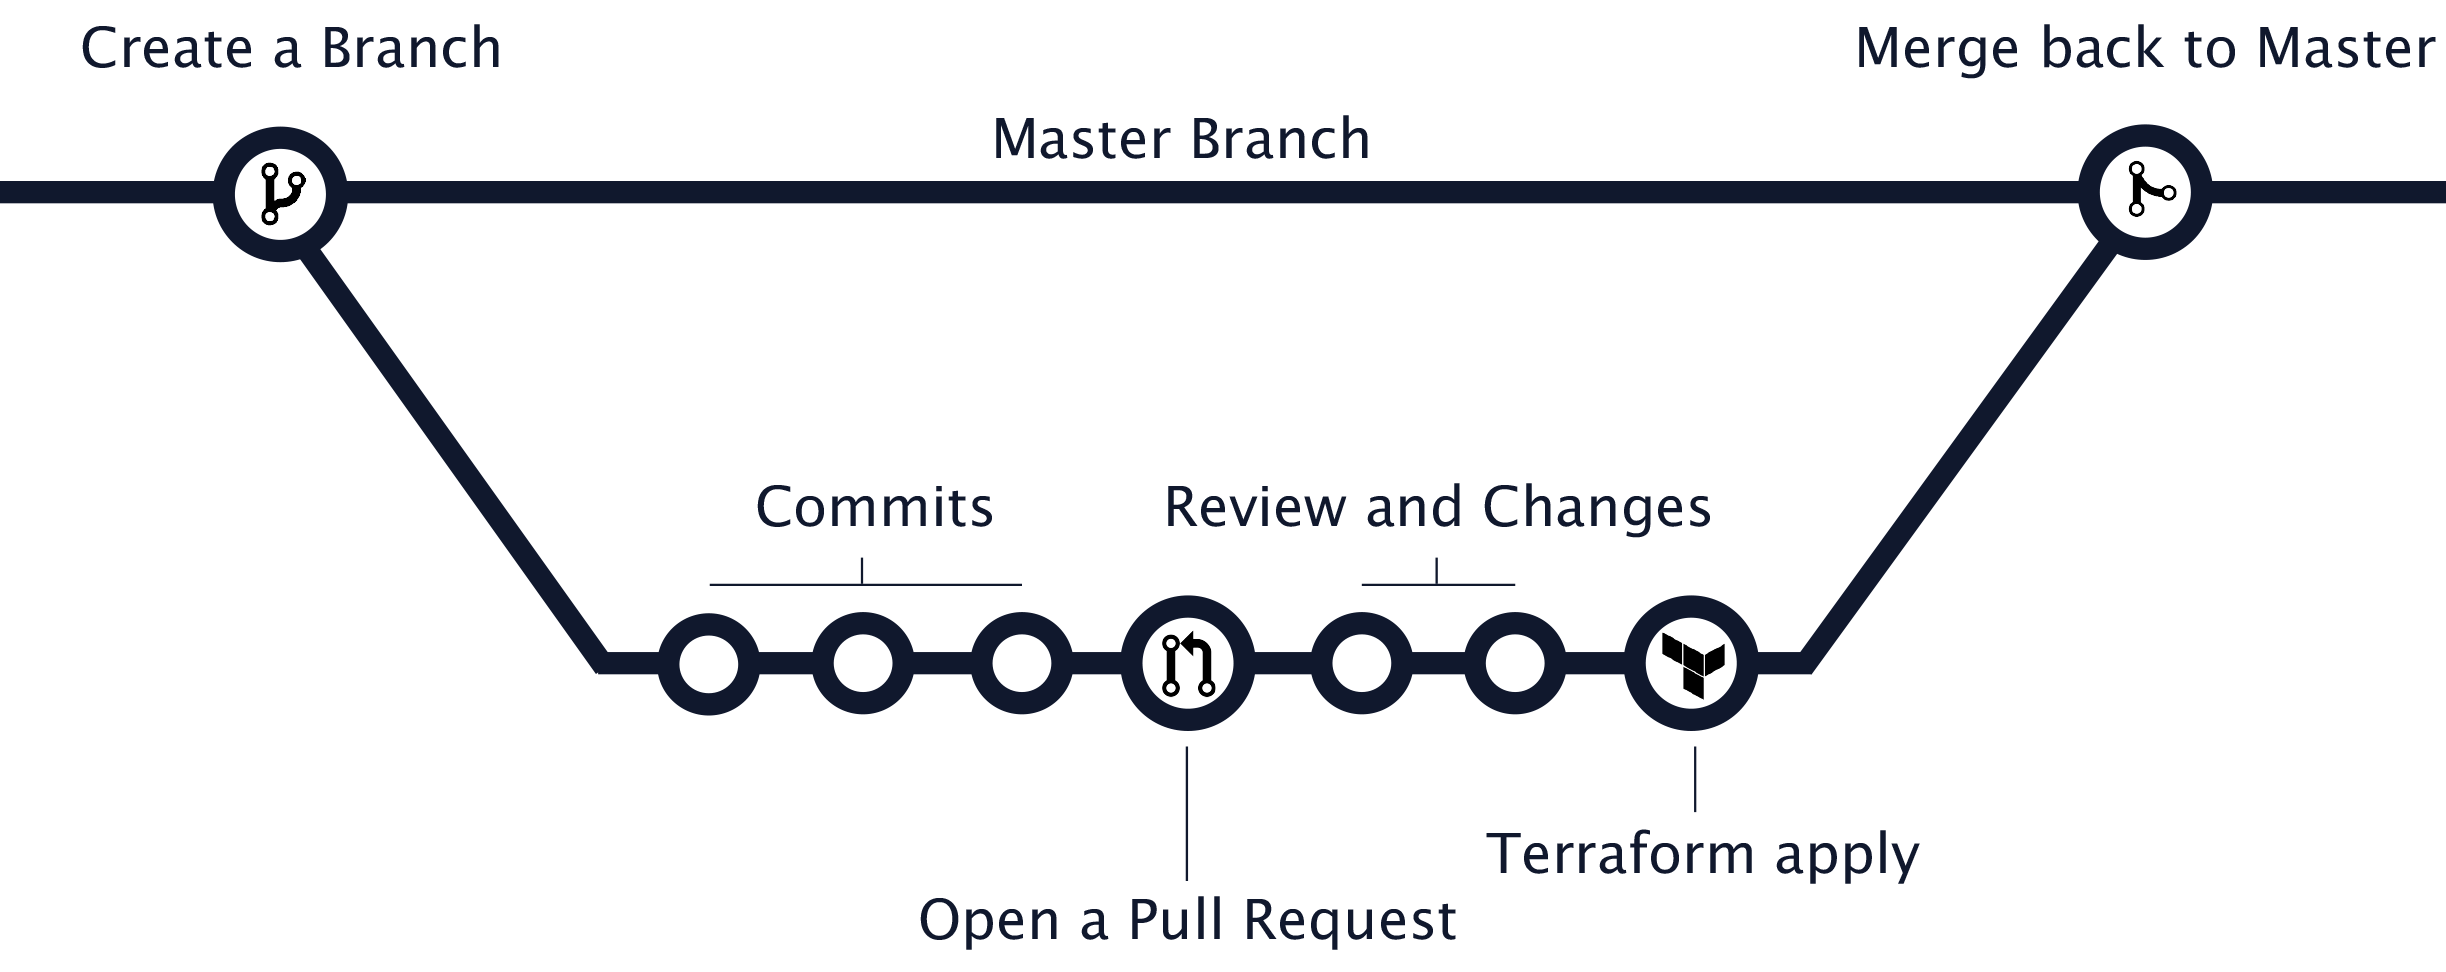
Whenever you are working on a project, you're going to have a bunch of different features in progress at any given time. Some of which are ready to go, and others which are not. Branching exists to help you manage this workflow collaboratively.
The same can be applied when managing GitHub organizations through code. To make usage of the GitHub flow, we agree on the following process:
- Whenever you'd like to apply a change to your GitHub Organization and its resources, you create a new branch from
master ( e.G. git branch -b add-new-repository ).
2. Whenever you add a commit to the newly created branch, a CI server runs terraform plan on the code changes.
3. Once the pull request is under review, the reviewers can easily review the output of terraform plan and suggest
changes.
4. When everything looks good, the author of the pull request should trigger the promotion which will run
terraform apply and merge the branch back to master.
Anything in the master branch should always be deployable and ideally reflect the actual state of your GitHub Organization. Anything in the master branch should always be deployable and reflect the actual state of your GitHub Organization. Because of this, your new branch must be created off of master when working on a feature or a fix.
Next, we will start implementing the flow.
Set up Terraform Remote State and State Locking with Amazon S3
In Part I of this series, we've only used Terraform in our local environment. Since your goal is to automate Terraform and ideally run all operations inside our CI pipeline, we need to move the state file from our local environment to a remote location.
We made good experience with storing the state in Amazon S3 but Terraform has integrations for a broad set of remote backends. Please notice that Amazon S3 is offering a free tier for S3. By the time of writing they allow you to store 5GB in S3 without charge for 12 months for new accounts.
If you work with a remote state, you risk multiple processes attempting to make changes to the same file simultaneously. We need to provide a mechanism that will “lock” the state if it is currently in use by another user. We can accomplish this by creating a DynamoDB table for Terraform to use.
If you don't have an account for Amazon Web Services (AWS) yet, now is a good time to open a new one.
Once you have your AWS account in place, we can start to span up the necessary resources we need to store the state and
the state locks. Let's create a file aws.tf with the following content.
aws.tf
# ---------------------------------------------------------------------------------------------------------------------
# Create S3 Bucket and DynamoDB Table
# ---------------------------------------------------------------------------------------------------------------------
module "terraform_state_s3_bucket" {
  source  = "mineiros-io/s3-bucket/aws"
  version = "~> 0.1.2"

  bucket  = "github-terraform-example-terraform-state"

  versioning = {
    enabled = true
  }
}

resource "aws_dynamodb_table" "terraform_state_lock" {
  name           = "terraform-state-lock"
  hash_key       = "LockID"
  read_capacity  = 20
  write_capacity = 20

  attribute {
    name = "LockID"
    type = "S"
  }
}

# ---------------------------------------------------------------------------------------------------------------------
# Create the IAM policies
# ---------------------------------------------------------------------------------------------------------------------

resource "aws_iam_policy" "terraform_s3_list_read_write_policy" {
  name        = "S3TerraformStateListReadWriteAccess"
  path        = "/"
  description = "This policy grants read and write permissions to the Terraform DyanmoDB state lock table."

  policy = data.aws_iam_policy_document.terraform_s3_list_read_write_policy_document.json
}

data "aws_iam_policy_document" "terraform_s3_list_read_write_policy_document" {
  statement {
    actions = [
      "s3:*"
    ]
    resources = [
      module.terraform_state_s3_bucket.arn,
      "${module.terraform_state_s3_bucket.arn}/organization/github-terraform-example/terraform.tfstate"
    ]
  }
}

resource "aws_iam_policy" "terraform_dynamodb_read_write_policy" {
  name        = "DynamoDBTerraformStateLocksReadWriteAccess"
  path        = "/"
  description = "This policy grants read and write permissions to the Terraform DyanmoDB state lock table."

  policy = data.aws_iam_policy_document.terraform_dynamodb_read_write_policy_document.json
}

data "aws_iam_policy_document" "terraform_dynamodb_read_write_policy_document" {
  statement {
    actions = [
      "dynamodb:*"
    ]
    resources = [aws_dynamodb_table.terraform_state_lock.arn]
  }
}

resource "aws_iam_policy" "iam_user_self_management_policy" {
  name        = "IAMUserSelfManagement"
  path        = "/"
  description = "This policy grants an fulls permissions to manage the terraform-ci IAM user and its related IAM policies."

  policy = data.aws_iam_policy_document.iam_user_self_management_policy_document.json
}

data "aws_caller_identity" "current" {}

data "aws_iam_policy_document" "iam_user_self_management_policy_document" {
  statement {
    actions = [
      "iam:*",
    ]
    resources = [
      aws_iam_user.user.arn,
      aws_iam_policy.terraform_dynamodb_read_write_policy.arn,
      aws_iam_policy.terraform_s3_list_read_write_policy.arn,
      "arn:aws:iam::${data.aws_caller_identity.current.account_id}:policy/IAMUserSelfManagement"
    ]
  }
}


# ---------------------------------------------------------------------------------------------------------------------
# Create the IAM user with attached policies
# ---------------------------------------------------------------------------------------------------------------------

resource "aws_iam_user" "user" {
  name = "terraform-ci"
}

resource "aws_iam_user_policy_attachment" "terraform_s3_list_read_write_policy" {
  user       = aws_iam_user.user.name
  policy_arn = aws_iam_policy.terraform_s3_list_read_write_policy.arn
}

resource "aws_iam_user_policy_attachment" "terraform_dynamodb_read_write_policy" {
  user       = aws_iam_user.user.name
  policy_arn = aws_iam_policy.terraform_dynamodb_read_write_policy.arn
}

resource "aws_iam_user_policy_attachment" "iam_user_self_management_policy" {
  user       = aws_iam_user.user.name
  policy_arn = aws_iam_policy.iam_user_self_management_policy.arn
}
Also, we need to configure the provider and Terraform requirements. To accomplish that please create the file
provider.tf with the following content.
provider.tf
# ---------------------------------------------------------------------------------------------------------------------
# SET THE TERRAFORM AND PROVIDER REQUIREMENTS
# ---------------------------------------------------------------------------------------------------------------------

terraform {
  required_version = "~> 0.12.24"

  required_providers {
    aws = "~> 2.4"
  }
}

provider "aws" {
  region = "us-east-1"
}
Let's take a look at both files.
In aws.tf we create a private S3 Bucket for storing Terraform's state and a DynamoDB
table for writing the state locks. Also, we create a new IAM user terraform-ci that will be used inside our CI
pipeline and follows the standard security advice of granting
least privilege that is
recommended by AWS.
Since we are managing both, the S3 bucket and DynamoDb Table through Terraform, the IAM user needs
to have full privileges on these resources. To achieve that we have to create IAM policies that allow the user to manage
both resources, the policies and also himself. If you decide to set up the resources without Terraform, the minimal
permissions that are needed for the user to manage both resources can be found in
Terraform's documentation.
To use the user inside our CI pipeline, we need to create access credentials. Terraform's AWS Provider provides the iam_access_key resources to provision credentials but for the sake of security we will create the credentials through the GUI and avoid storing them in Terraform's state file.
If you've just created a new AWS account, please create a new IAM admin user with create some access credentials. Don't use your root account since it's considered to be unsafe and therefore a bad practice.
To get the Terraform AWS Provider working, you need to provide the credentials via the AWS_ACCESS_KEY_ID and
AWS_SECRET_ACCESS_KEY environment variables.
export AWS_ACCESS_KEY_ID=XXXXX
export AWS_SECRET_ACCESS_XXXXX
Tip: If you are working with multiple AWS accounts or you'd like to store the credentials safely in a keychain, we'd suggest you take a look at aws-vault.
Next, please run terraform init to initialize your Terraform environment and terraform apply to deploy the
resources.

That's it! Terraform created the required resources for you. Now it's time to update the provider.tf file and enable
the S3 remote backend.
provider.tf
# ---------------------------------------------------------------------------------------------------------------------
# SET TERRAFORM AND PROVIDER REQUIREMENTS
# ---------------------------------------------------------------------------------------------------------------------

terraform {
  required_version = "~> 0.12.24"

  backend "s3" {
    bucket         = "github-terraform-example-terraform-state"
    key            = "organization/github-terraform-example/terraform.tfstate"
    region         = "us-east-1"
    encrypt        = true
    dynamodb_table = "terraform-state-lock"
  }

  required_providers {
    github = "~> 2.4"
  }
}

provider "github" {
  organization = "github-terraform-example"
}

provider "aws" {
  region = "us-east-1"
}
To migrate state from your local environment to the remote backend you should run terraform init again.

Abstract common logic with Docker and GNU Make
We believe that a CI server shouldn't own logic. Ideally, it triggers a prepared set of instructions based on constraints. In our infrastructure as code projects, we typically work with a task manager to unify the logic for the commonly used tasks. There are tons of great task managers out there but we always tend to use GNU Make which is a great, battle-tested choice that doesn't add any overhead to our projects.
Let's create the Makefile with the following content.
Makefile
SHELL := /bin/bash

GREEN  := $(shell tput -Txterm setaf 2)
RESET  := $(shell tput -Txterm sgr0)

MOUNT_TARGET_DIRECTORY  = /app/src
BUILD_TOOLS_DOCKER_REPO = mineiros/build-tools

# Set default value for environment variable if there aren't set already
ifndef BUILD_TOOLS_VERSION
 BUILD_TOOLS_VERSION := v0.0.3
endif

ifndef BUILD_TOOLS_DOCKER_IMAGE
 BUILD_TOOLS_DOCKER_IMAGE := ${BUILD_TOOLS_DOCKER_REPO}:${BUILD_TOOLS_VERSION}
endif

ifndef TERRAFORM_PLANFILE
 TERRAFORM_PLANFILE := out.tfplan
endif

# Mounts the working directory inside a docker container and runs the pre-commit hooks
pre-commit-hooks:
 @echo "${GREEN}Start running the pre-commit hooks inside a docker container${RESET}"
 @docker run --rm \
  -v ${PWD}:${MOUNT_TARGET_DIRECTORY} \
  ${BUILD_TOOLS_DOCKER_IMAGE} \
  sh -c "pre-commit run -a"

# Initialize a working directory containing Terraform configuration files
terraform-init:
 @echo "${GREEN}Start running terraform init inside a docker container${RESET}"
 @docker run --rm \
  -e AWS_ACCESS_KEY_ID \
  -e AWS_SECRET_ACCESS_KEY \
  -e GITHUB_TOKEN \
  -e GITHUB_ORGANIZATION \
  -e TF_IN_AUTOMATION \
  -v `pwd`:/app/src \
  ${BUILD_TOOLS_DOCKER_IMAGE} \
  sh -c "terraform init -input=false"

# Mounts the working directory inside a new container and runs terraform plan
terraform-plan:
 @echo "${GREEN}Start running terraform plan inside a docker container${RESET}"
 @docker run --rm \
  -e AWS_ACCESS_KEY_ID \
  -e AWS_SECRET_ACCESS_KEY \
  -e GITHUB_TOKEN \
  -e GITHUB_ORGANIZATION \
  -e TF_IN_AUTOMATION \
  -v `pwd`:/app/src \
  ${BUILD_TOOLS_DOCKER_IMAGE} \
  sh -c "terraform plan -input=false -out=${TERRAFORM_PLANFILE}"

# Mounts the working directory inside a new container and runs terraform apply
terraform-apply:
 @echo "${GREEN}Start running terraform apply inside a docker container${RESET}"
 @docker run --rm \
  -e AWS_ACCESS_KEY_ID \
  -e AWS_SECRET_ACCESS_KEY \
  -e GITHUB_TOKEN \
  -e GITHUB_ORGANIZATION \
  -e TF_IN_AUTOMATION \
  -v `pwd`:/app/src \
  ${BUILD_TOOLS_DOCKER_IMAGE} \
  sh -c "terraform apply -input=false -auto-approve ${TERRAFORM_PLANFILE}"

.PHONY: pre-commit-hooks terraform-plan terraform-apply
The Makefile offers targets for each task we need in order to automate Terraform in our Pipeline. You might have noticed that instead of calling the terraform binary directly, we work with a Docker container instead. This saves us some time and effort and means, that the CI server only needs to have docker installed. Each task simply spans up a container of our build-tools image. The image is just a lean Alpine Linux based image that has some tools such as Terraform, Packer and Go pre-installed.
Using Docker and GNU Make makes it very easy to decouple the necessary logic from our pipeline. All the CI now needs to do is to call the Makefile targets and to provide the necessary arguments.
Create a GitHub Repository for versioning the Code
Let's create a new repository inside our GitHub organization to version our code.
Please create the file repository.tf with the following content.
repository.tf
module "iac-github" {
  source  = "mineiros-io/repository/github"
  version = "~>0.1.0"

  name        = "iac-github"
  private     = true
  description = "An example on how to manage a GitHub organization with Terraform."

  allow_merge_commit = true

  gitignore_template = "Terraform"
  license_template   = "mit"
  auto_init          = true
}
In this example, we are using the terraform-github-repository open-source Terraform module which helps you to quickly create repositories following best practices. Please see the README.md for details.
Please note that for the sake of demonstration we set the repositories visibility to public. If you create the
repository for your own organization, you will most likely want to create a private repository.
Also, it is a good practice to create a new GitHub machine user and use it instead of your personal one for automating the deployments in your CI pipeline. To be able to communicate with the GitHub API, we need to issue a personal access token.
export GITHUB_TOKEN=XXXXX
Let’s run terraform init again to download the required module and terraform apply to create the repository.

Hurray! Terraform created the new repository for us. Let's initialize Git in our working directory, add the created repository as a remote and push our code.
git init
git remote add origin git@github.com:github-terraform-example/iac-github.git
git add aws.tf provider.tf repository.tf Makefile
git commit -m "configure remote backend, add github iac repository and Makefile"
git push origin master
Implement the Pipeline in Semaphore
Now that we took care of all the requirements we can finally implement our CI pipeline. We've chosen Semaphore as our CI/CD server but it is easy to replicate the next steps with any major CI / CD provider.
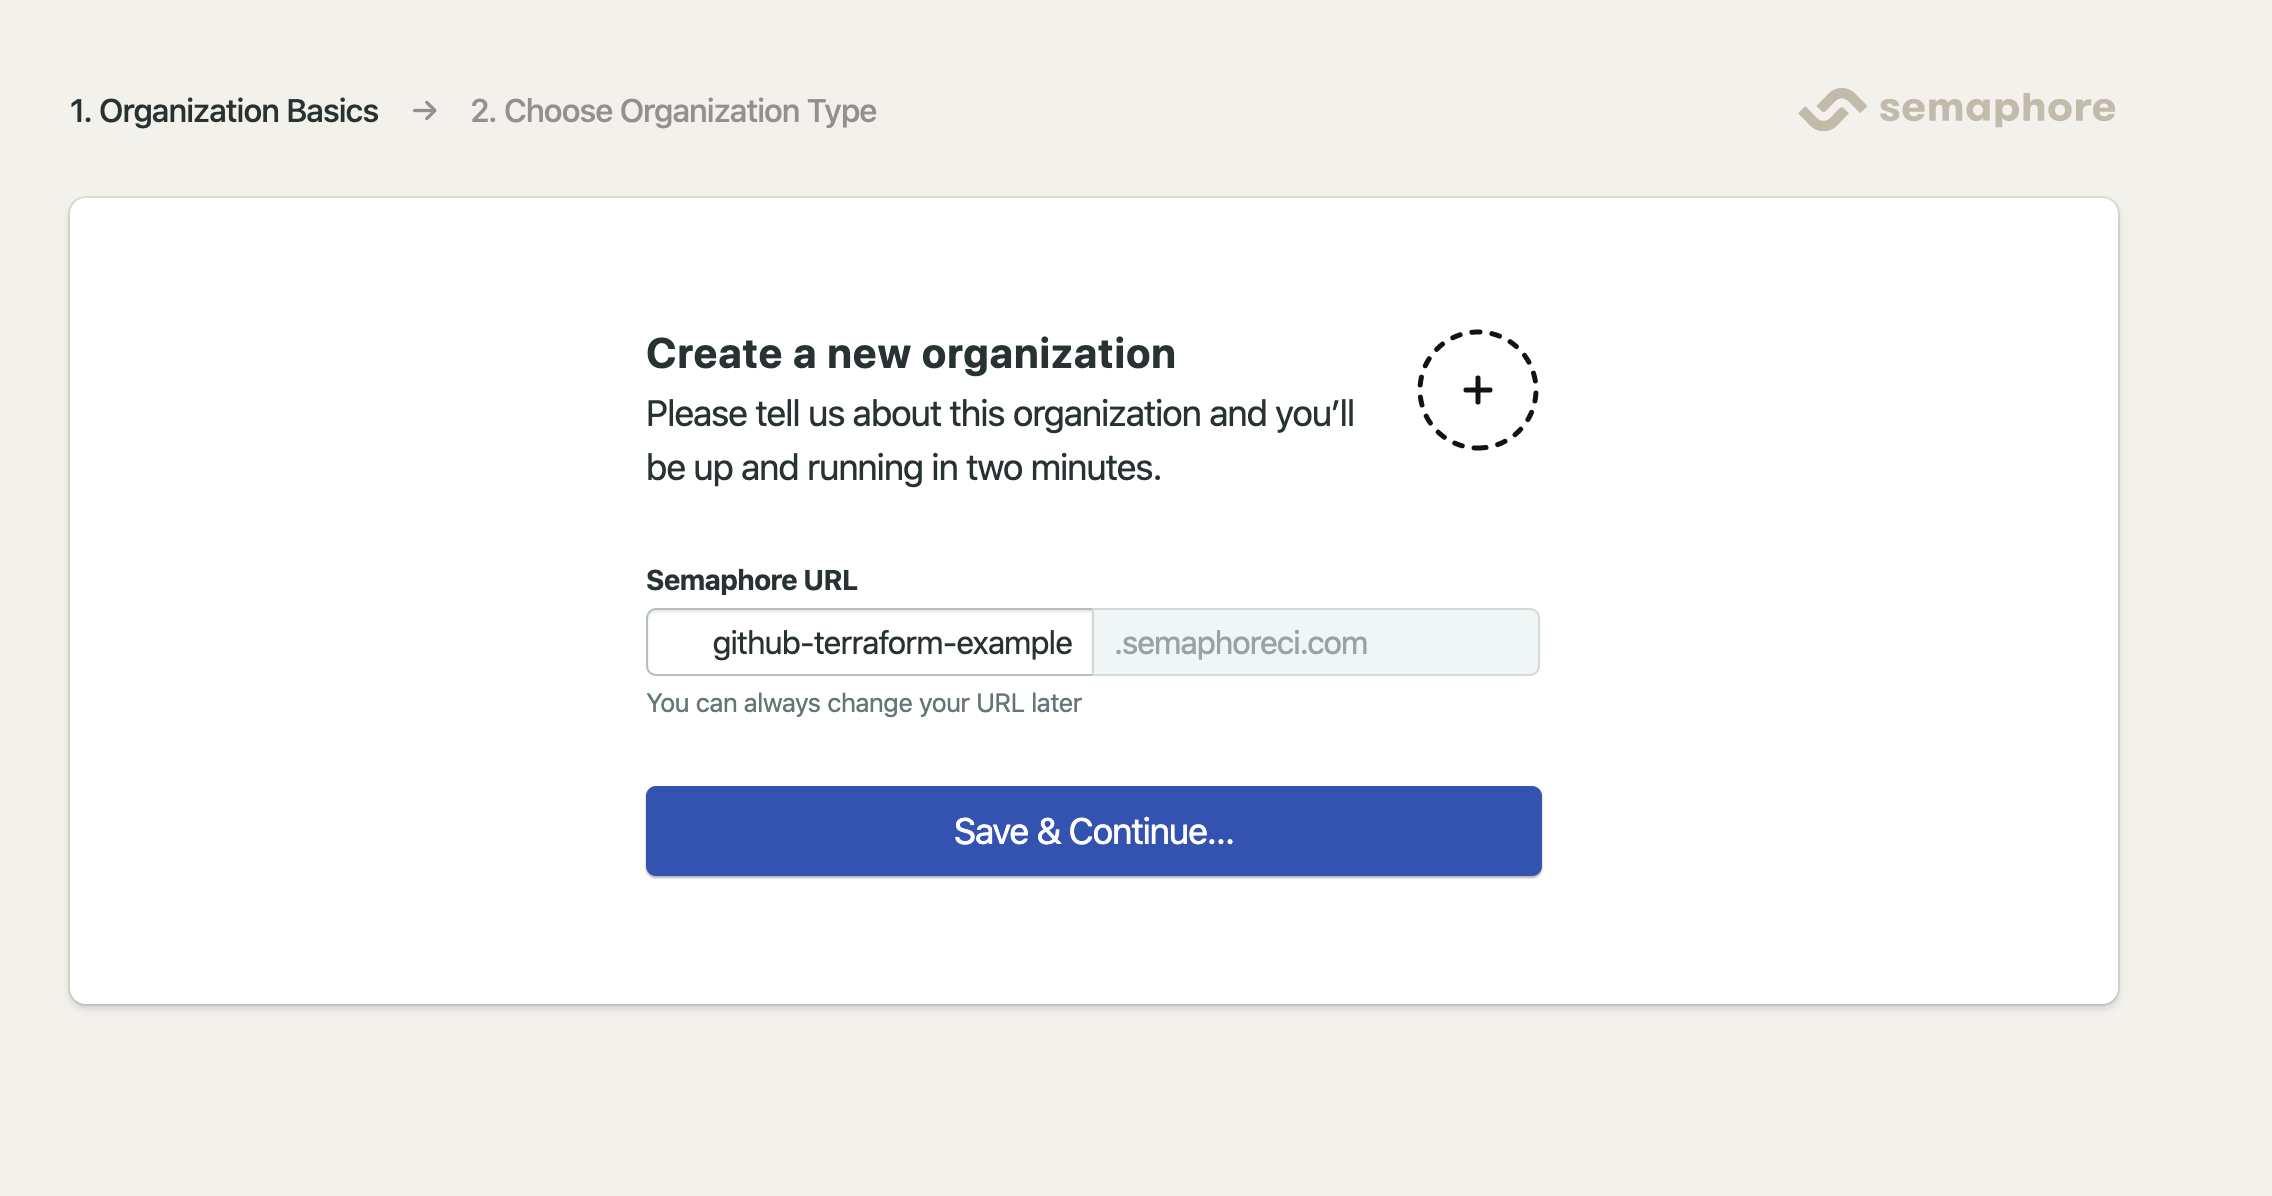
If you don't have an account with semaphore yet, please register a new one and create your desired organization.
Also, make sure that you authorized Semaphore as an OAuth App in your GitHub account so it has the necessary permissions to communicate with your GitHub organization and its resources.
Next, we create some access credentials for our terraform-ci IAM user. Please login to the AWS GUI and
issue the credentials.
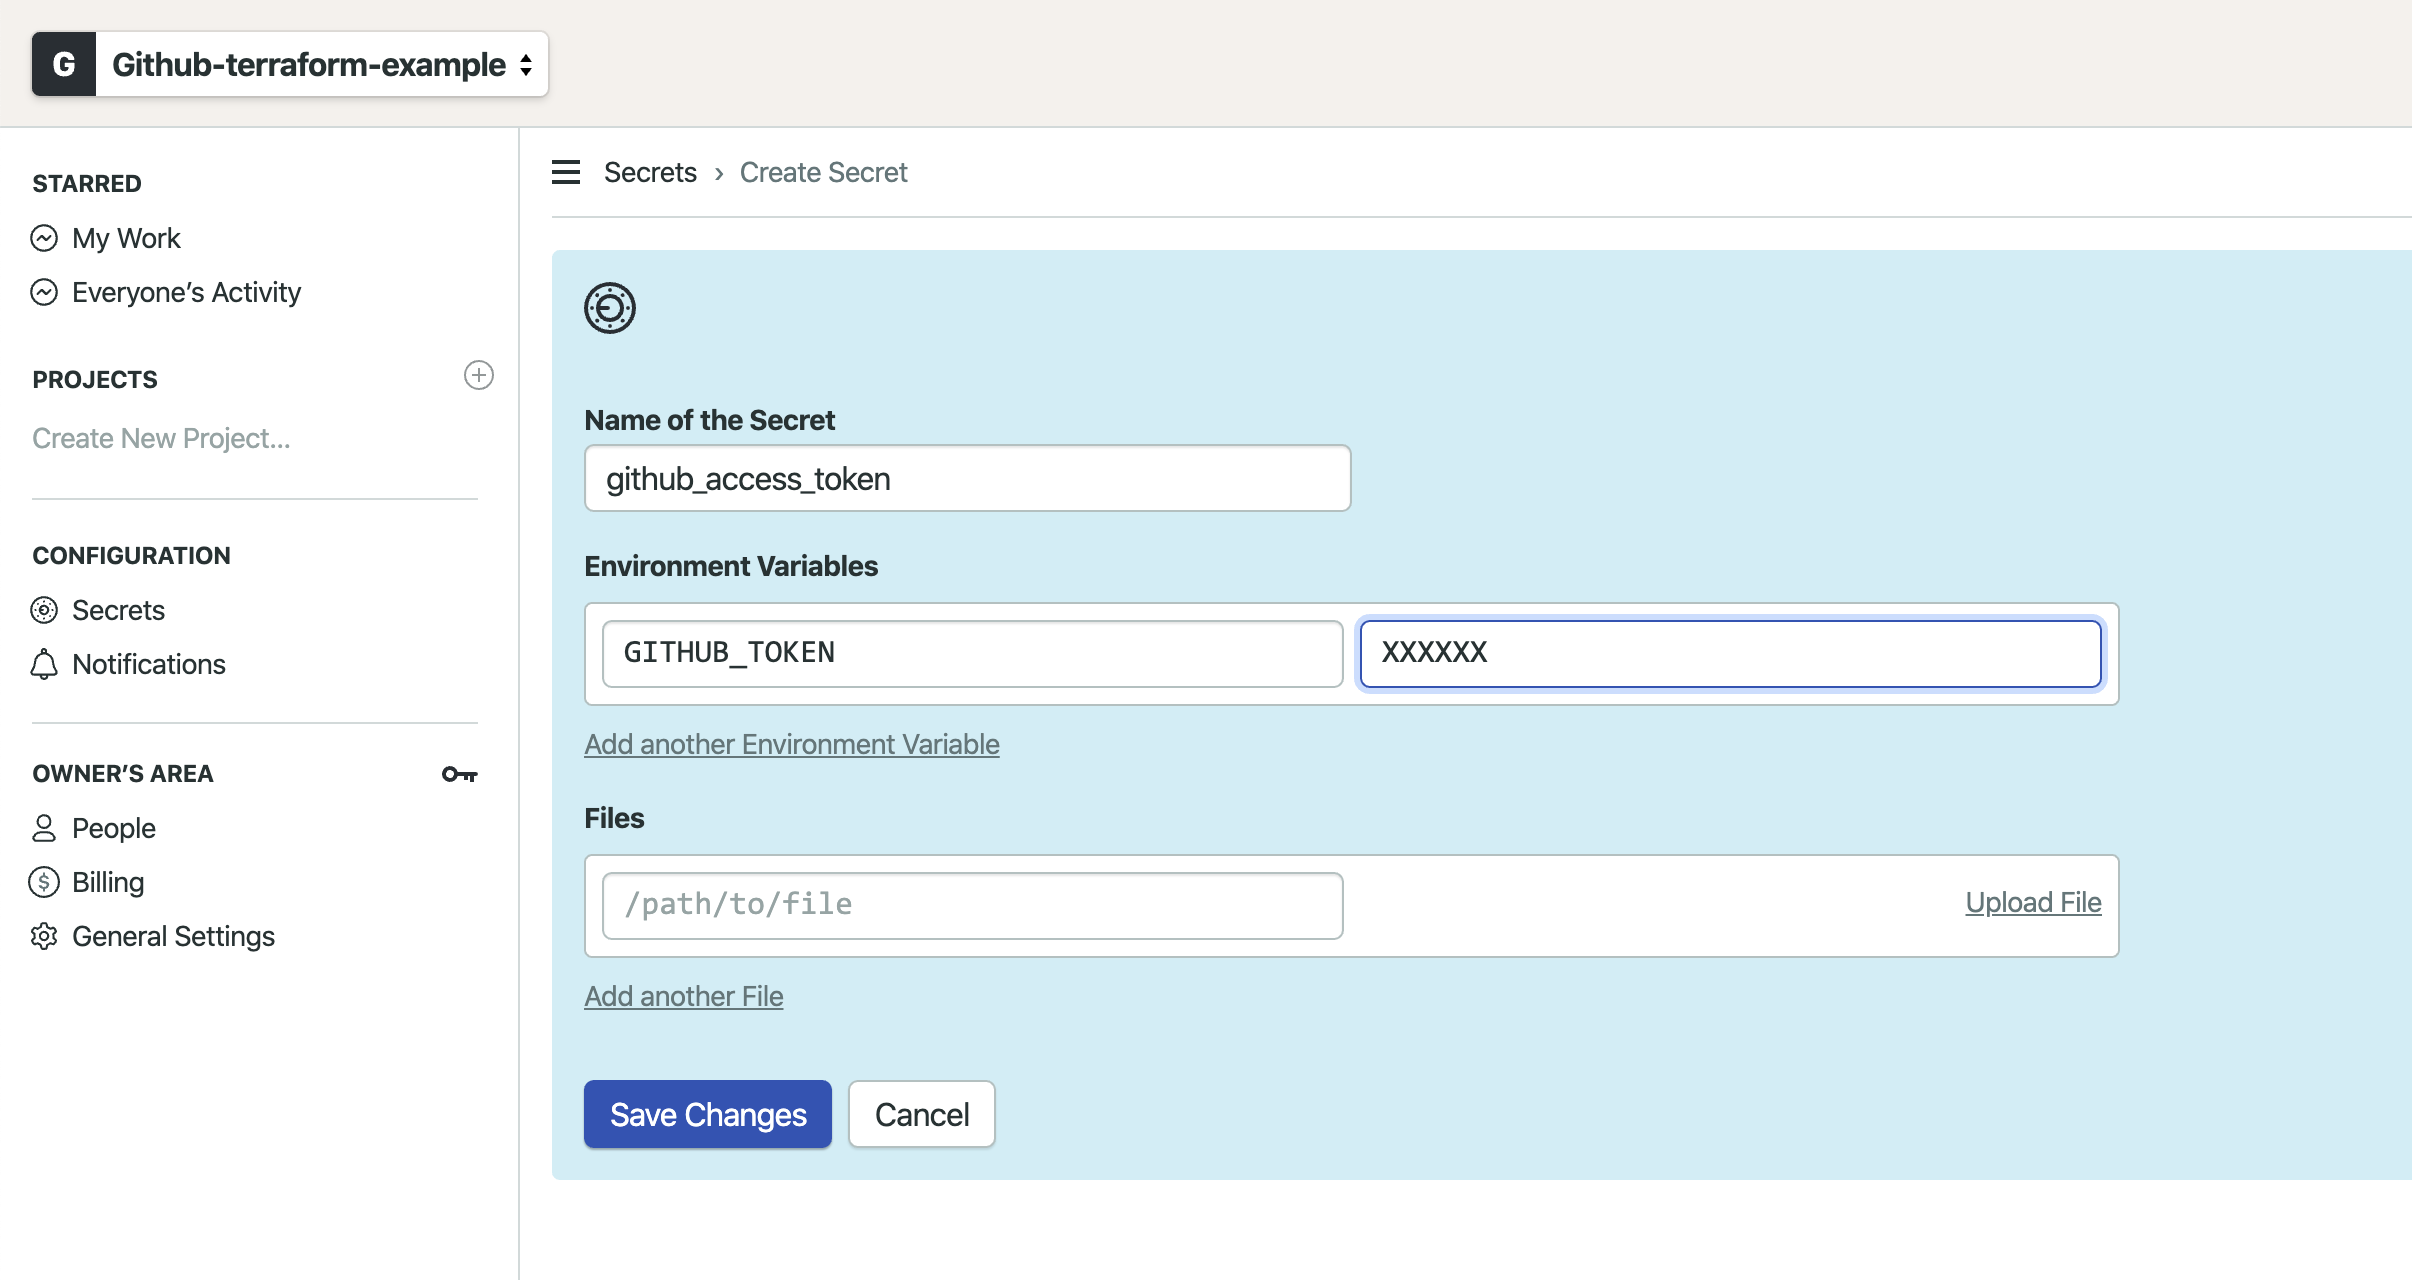
Let's add the credentials as a secret to our semaphore organization so we can use them in our pipeline. We also need to add the personal access token of our GitHub machine user.
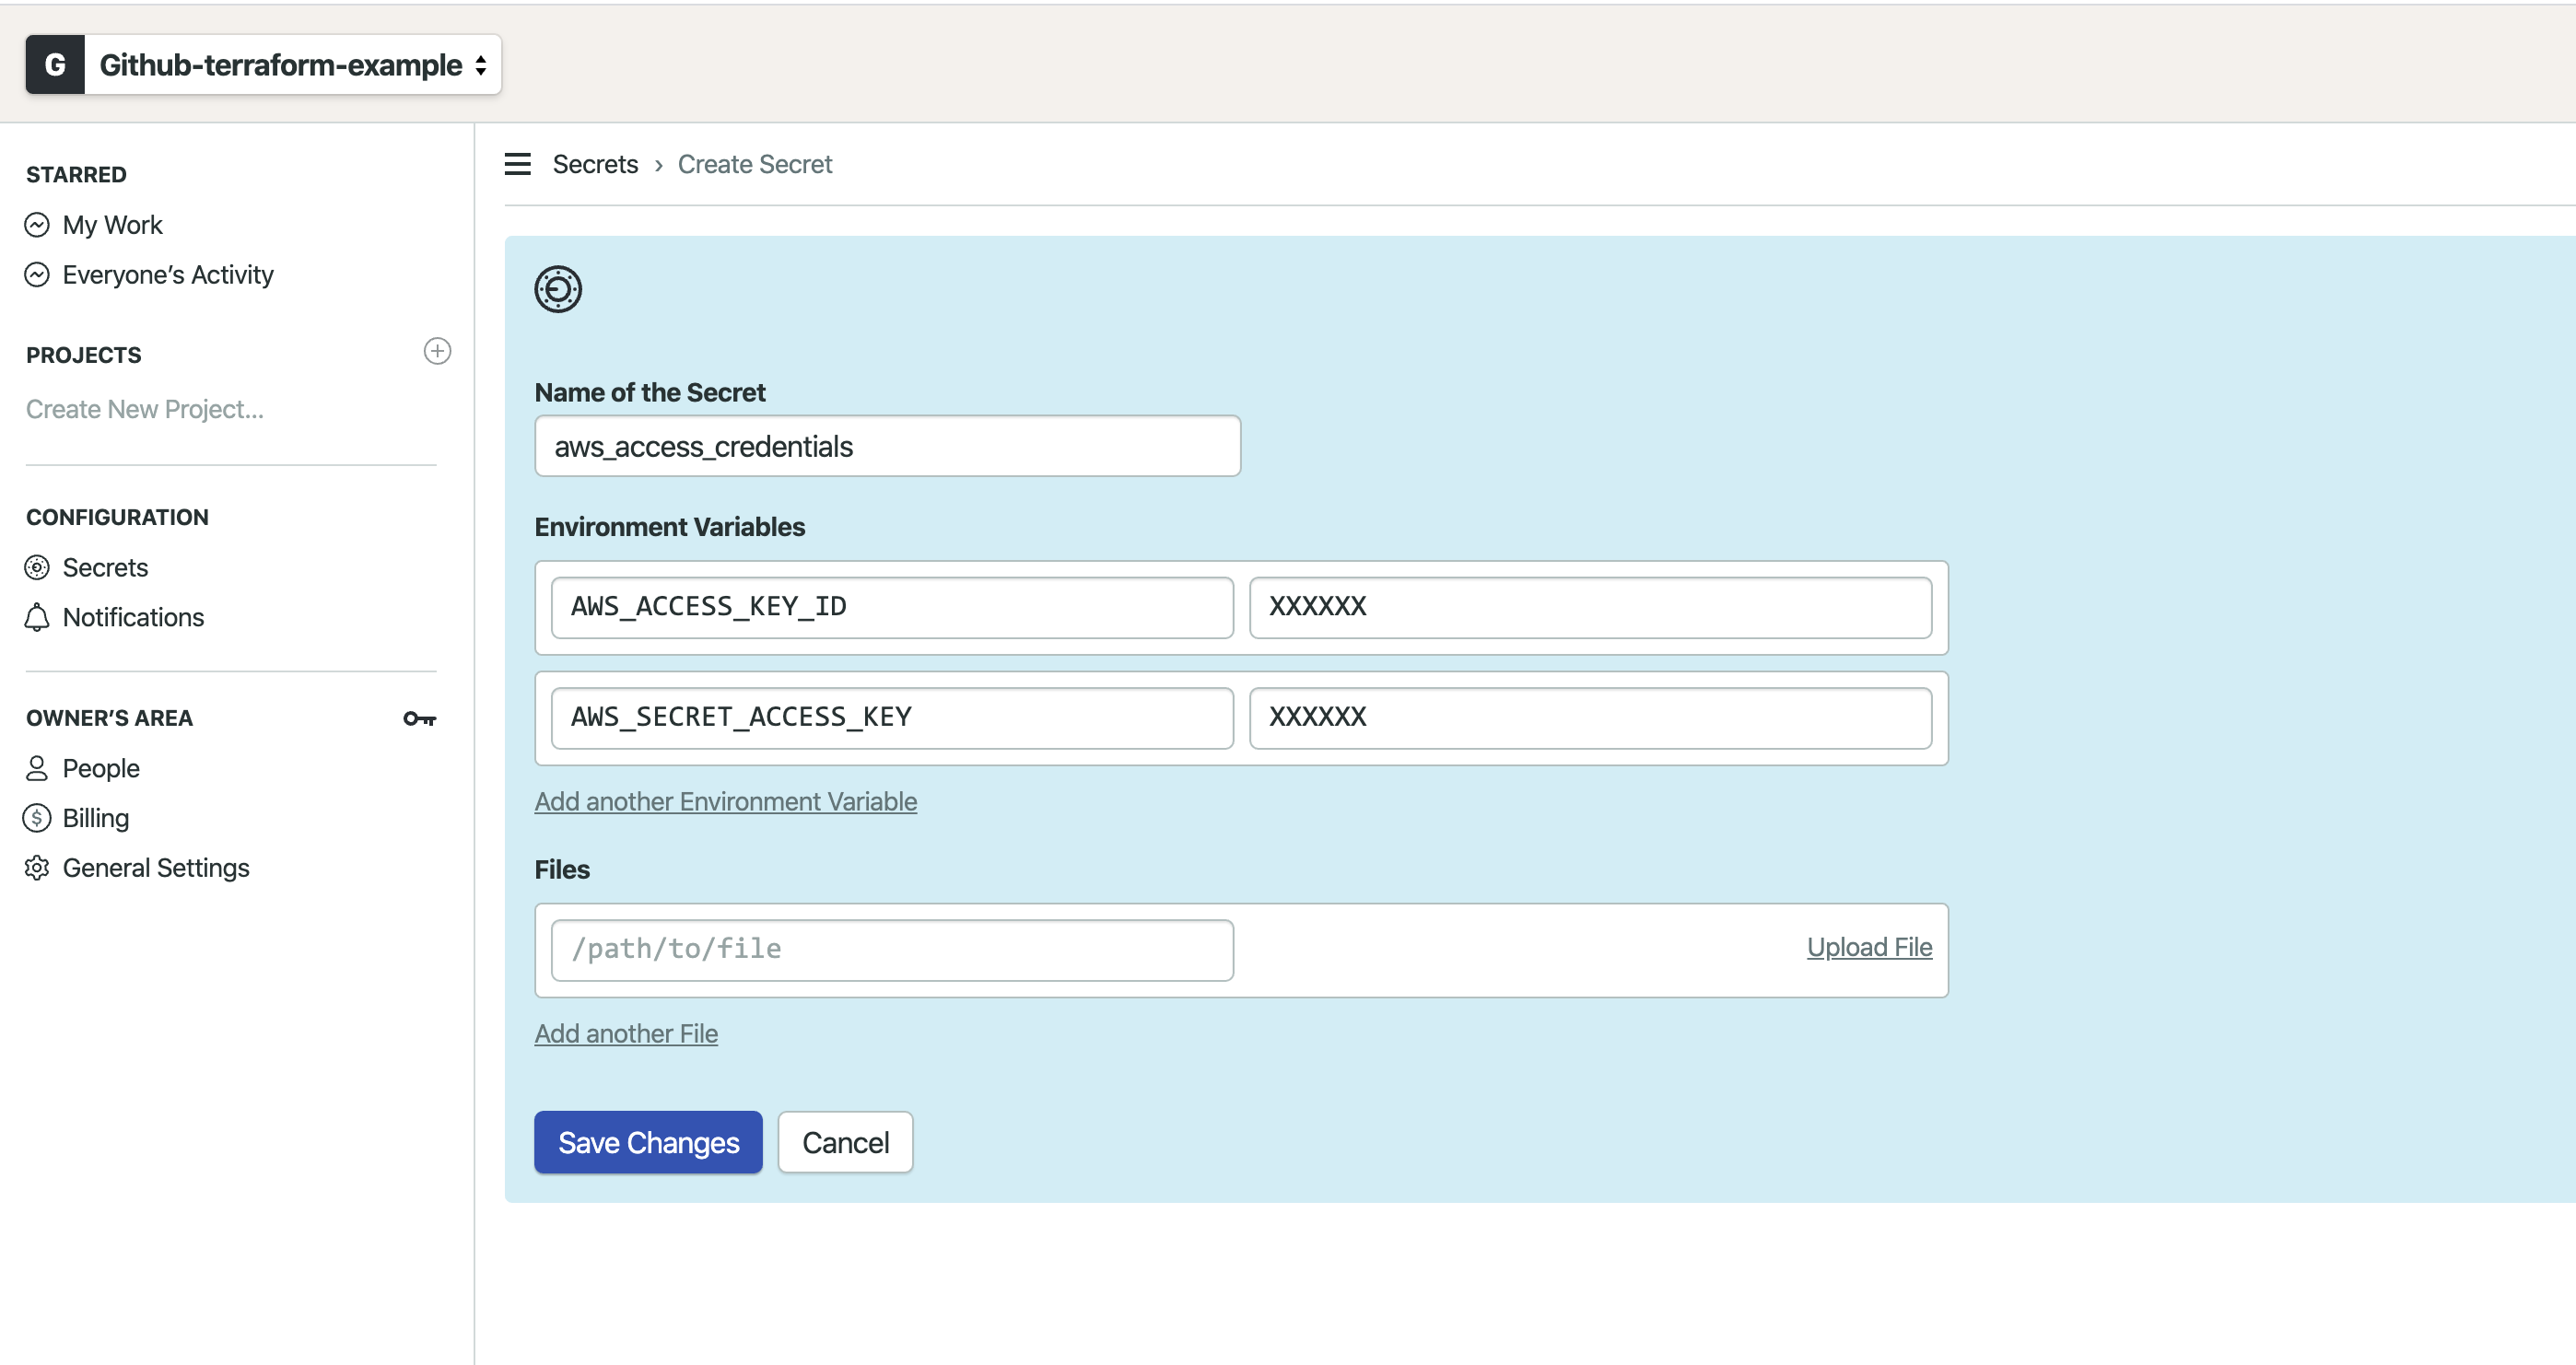
We also need to create another secret for the personal access token of our GitHub machine user.
In order to make semaphore building our repository, we need to add it as a project in Semaphore. Semaphore will add a webhook to our repository to receive notifications for every change that will occur. Semaphore will listen to changes and trigger a new build once we commit changes to our repository.
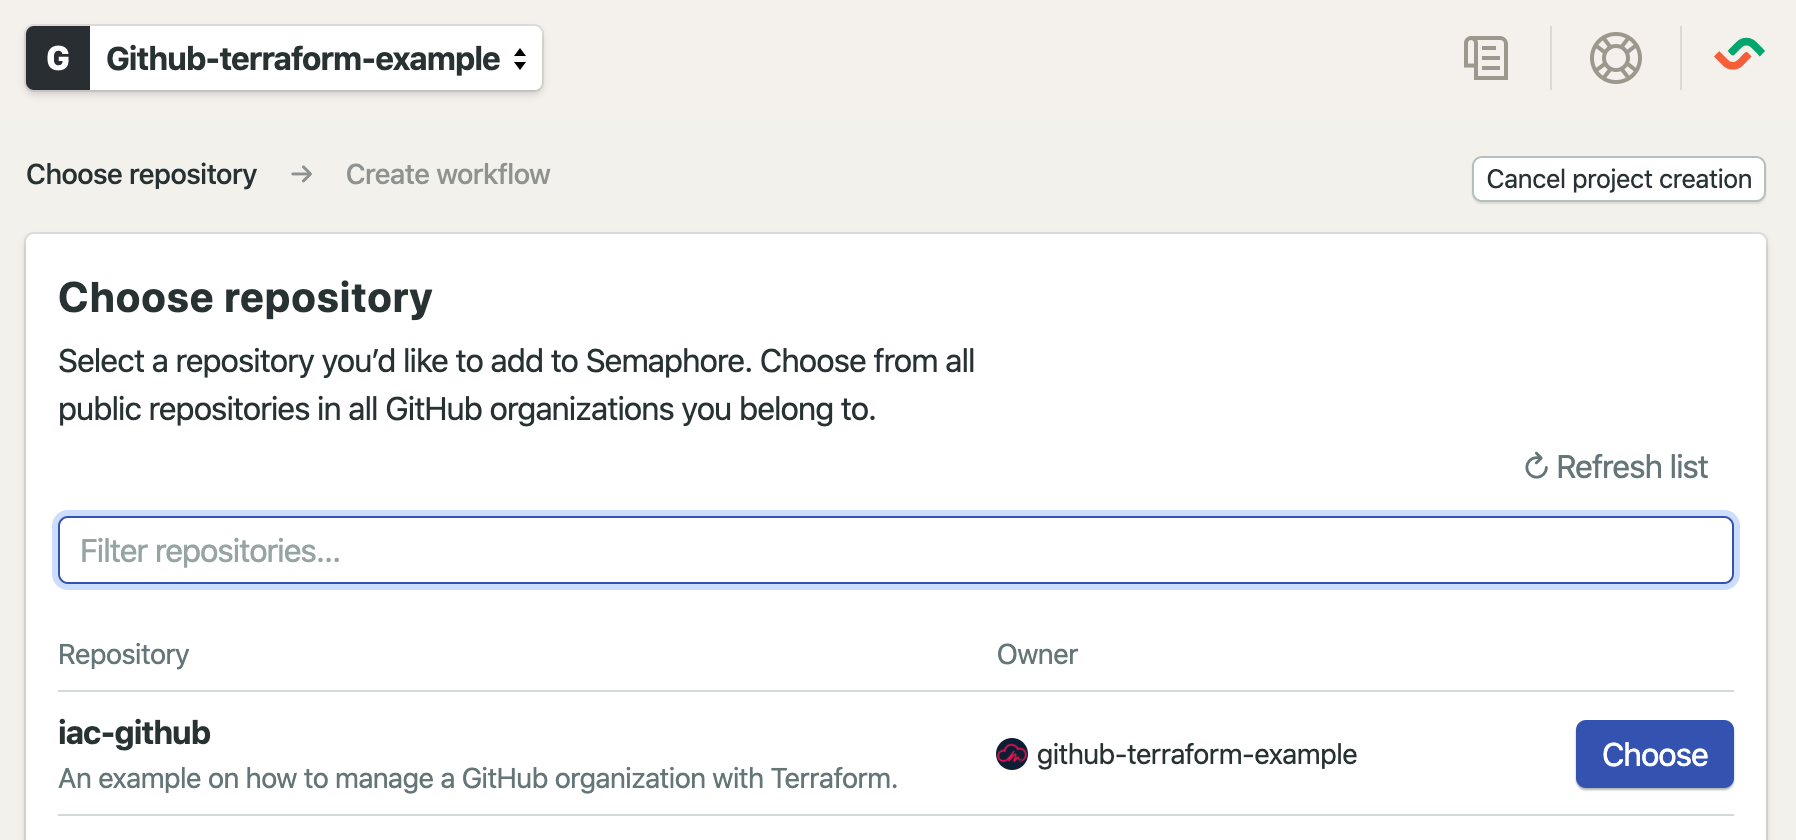
The last step is to add the pipeline configuration to our codebase. Please create the directory .semaphoreci and add
the two files semaphore.yml and deploy.yml with the following content inside the directory.
semaphore.yml
version: v1.0
name: "IaC-Github CI Pipeline"
agent:
  machine:
    type: e1-standard-2
    os_image: ubuntu1804

global_job_config:
  env_vars:
    - name: BUILD_TOOLS_VERSION
      value: v0.1.2
    - name: TF_IN_AUTOMATION
      value: "yes"
    - name: TERRAFORM_PLANFILE
      value: "out.tfplan"
  secrets:
    - name: github_access_token
    - name: aws_access_credentials
  prologue:
    commands:
      - checkout --use-cache

blocks:
  - name: "Lint and Plan"
    task:
      prologue:
        commands:
          - cache clear
      jobs:
        - name: "Pre Commit Hooks"
          commands:
            - make pre-commit-hooks
        - name: "Terraform Plan"
          commands:
            - make terraform-init
            - make terraform-plan
            - cache store terraform-wd-$SEMAPHORE_GIT_BRANCH .terraform
            - cache store terraform-planfile-$SEMAPHORE_GIT_BRANCH $TERRAFORM_PLANFILE

promotions:
  - name: "IaC-Github Deploy to GitHub"
    pipeline_file: deploy.yml
    auto_promote:
      when: "branch = 'master'"
deploy.yml
version: v1.0
name: "Deploy to GitHub"
agent:
  machine:
    type: e1-standard-2
    os_image: ubuntu1804

global_job_config:
  env_vars:
    - name: BUILD_TOOLS_VERSION
      value: v0.1.1
    - name: TF_IN_AUTOMATION
      value: "yes"
    - name: TERRAFORM_PLANFILE
      value: "out.tfplan"
  secrets:
    - name: github_access_token
    - name: aws_access_credentials
  prologue:
    commands:
      - checkout --use-cache

blocks:
  - name: "Deploy"
    task:
      prologue:
        commands:
          - cache restore terraform-wd-$SEMAPHORE_GIT_BRANCH
          - cache restore terraform-planfile-$SEMAPHORE_GIT_BRANCH
      jobs:
        - name: "Terraform Apply"
          commands:
            - make terraform-apply
            - cache clear
That's it! Semaphore will now trigger new builds on every commit. It will automatically deploy commits to master but also grants your team to trigger promotions manually.
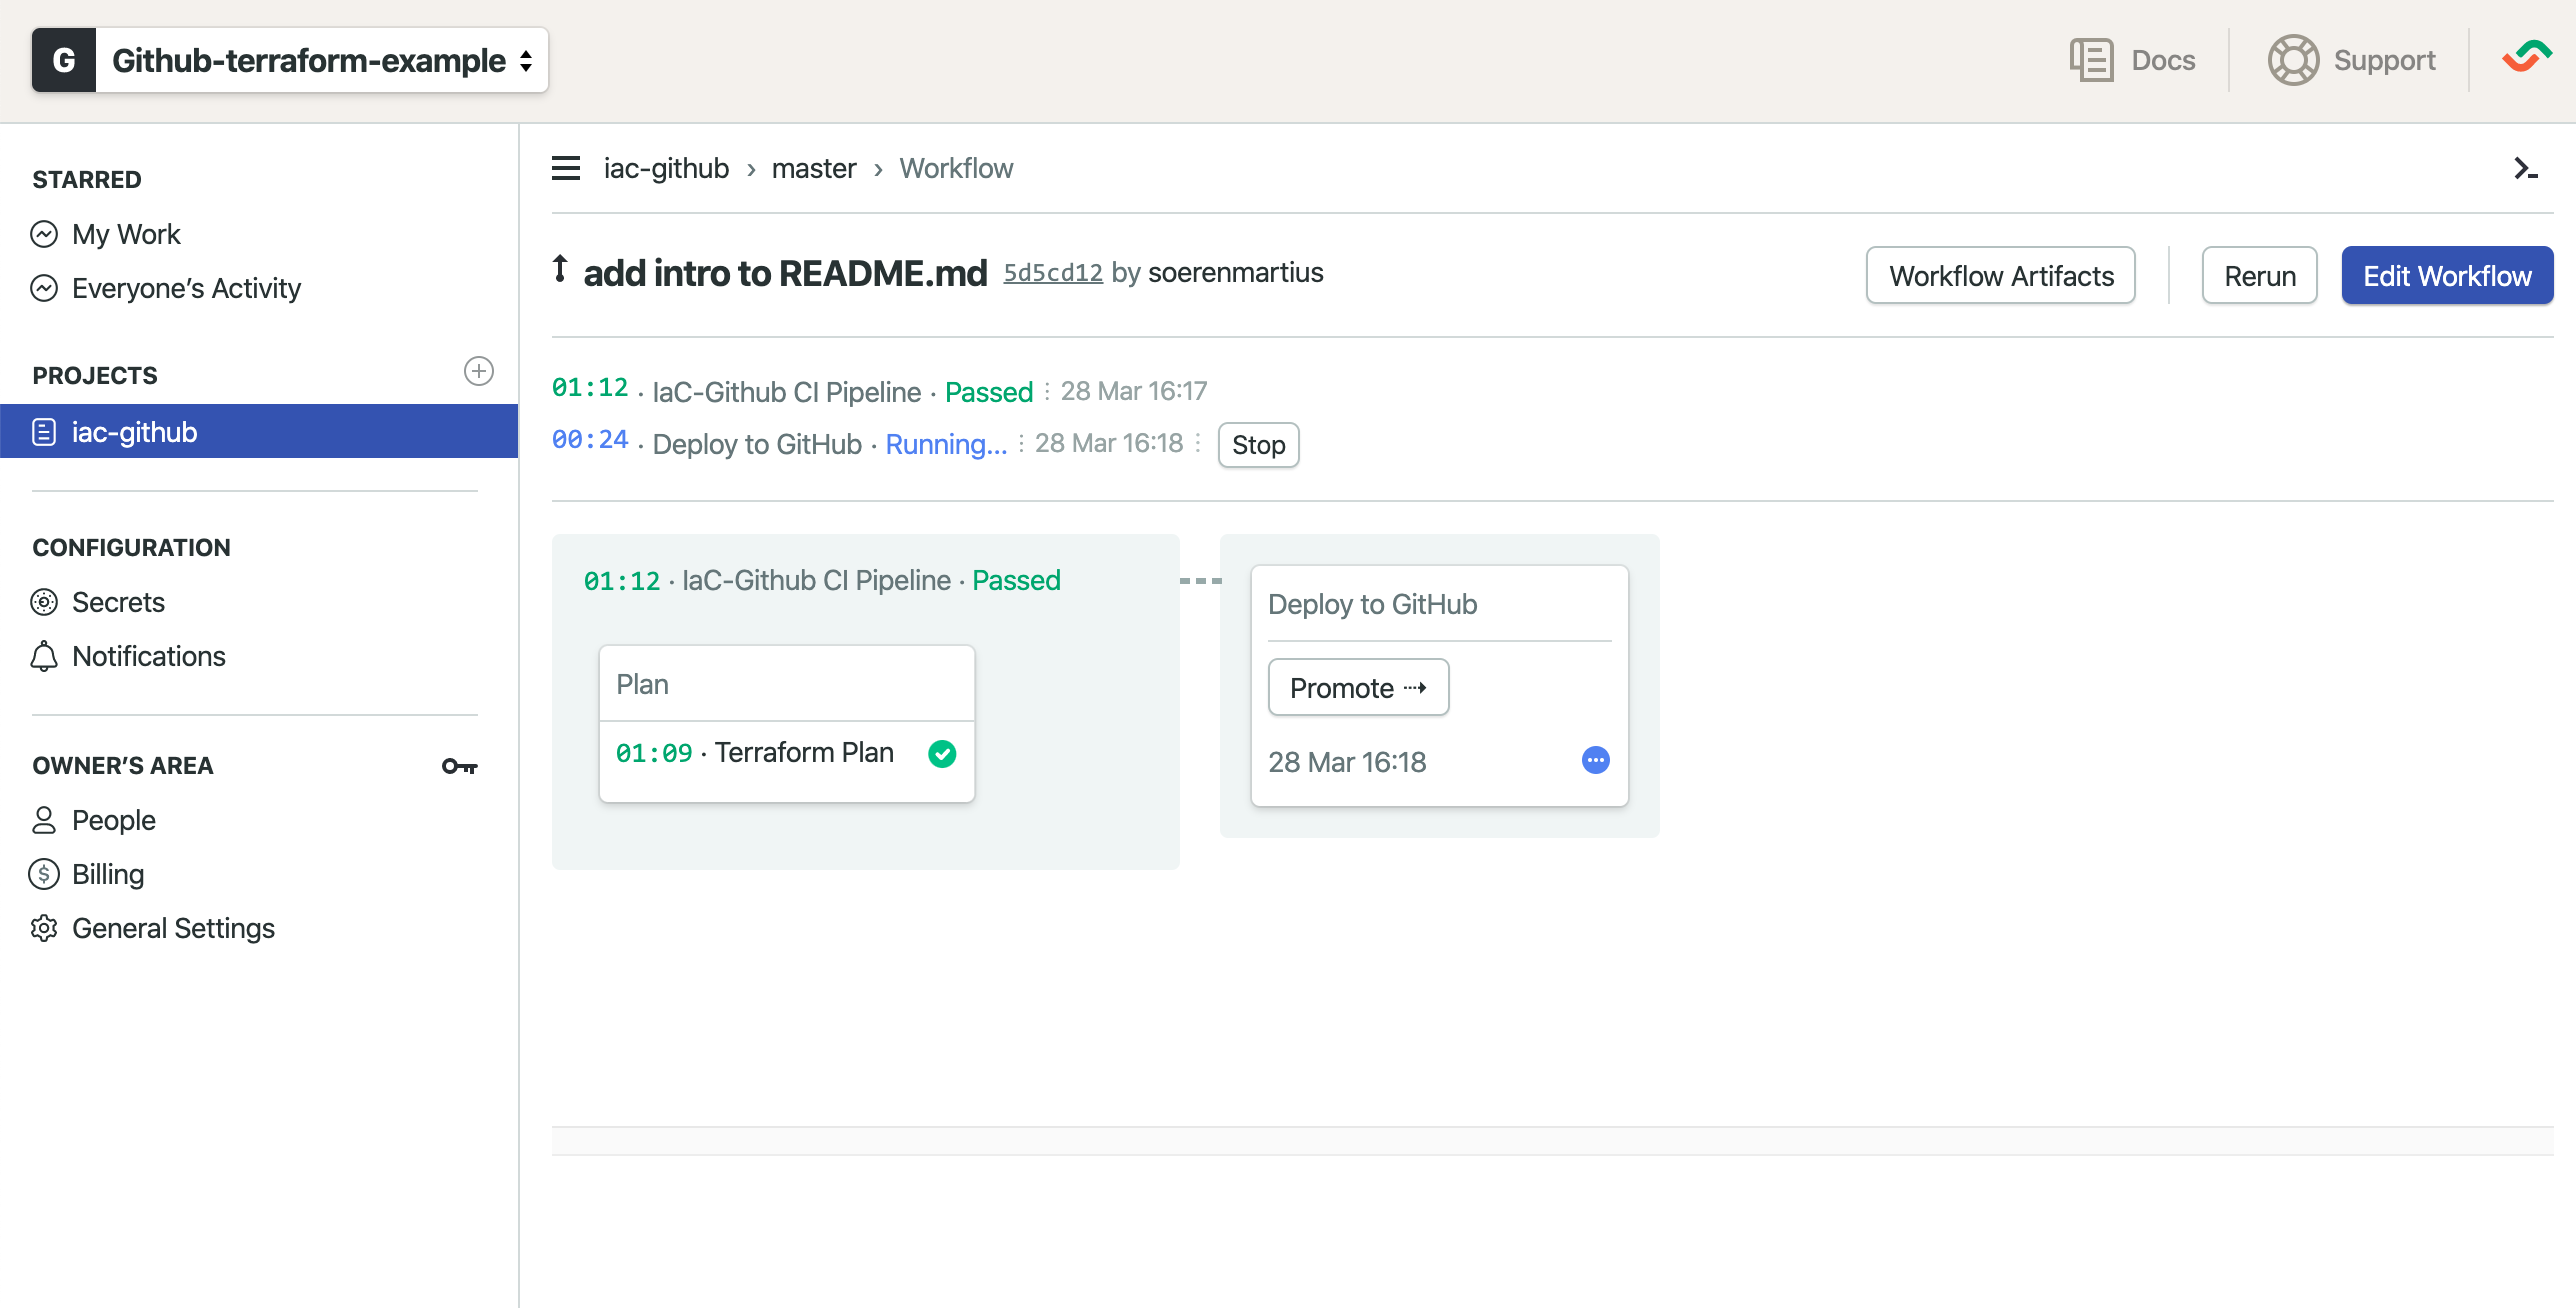
Now you can start to add new repositories, teams and members to your codebase. E.g., if you would like to add a
branch protection rule to
the master branch, just open a new branch and alter the repository.tf file.
repository.tf
module "iac-github" {
  source  = "mineiros-io/repository/github"
  version = "~> 0.1.0"

  name        = "iac-github"
  private     = true
  description = "An example on how to manage a GitHub organization with Terraform."

  allow_merge_commit = true

  gitignore_template = "Terraform"
  license_template   = "mit"
  auto_init          = true

  branch_protections = [
    {
      branch         = "master"
      enforce_admins = false

      required_status_checks = {
        strict   = true
        contexts = ["ci/semaphoreci/push: IaC-Github CI Pipeline"]
      }

      required_pull_request_reviews = {
        dismiss_stale_reviews           = true
        require_code_owner_reviews      = true
        required_approving_review_count = 1
      }
    }
  ]
}
Conclusion
In this article, you learned how to automate the deployment of your GitHub infrastructure as code with Semaphore. You also learned how to migrate the local state to a remote location and how to apply state locks. You are now ready to go to start managing your own GitHub organization through code.
We hope that this article helps you to get started quickly. If you need help or more information, don't hesitate to send us an email at hello@mineiros.io
Article last updated: 7/5/2021, 9:40:30 AM